Video Boosts Engagement & Retention – Well-made videos improve learning by providing dynamic, visual content that enhances student engagement and memory retention.
Planning is Key – Before filming, outline your course structure, decide on video types, and clarify objectives to ensure your videos align with your educational goals.
Quality Matters – Invest in good lighting, audio, and editing to produce professional-looking videos that support your course's credibility and effectiveness.
Creating videos for online courses is no longer optional—it's essential. Videos enhance your course's credibility, improve the user experience, and help your content rank better on search engines.
Did you know that 83% of tutors plan to increase their video marketing budgets this year?. This trend underscores the power of video as a learning and promotional tool.
In this post, we’ll break down practical tips for creating engaging and high-quality videos for your online courses that capture attention and drive results. Whether you're planning a course promotion or designing educational content, this guide will help you make impactful choices.
How Videos Make Your Online Courses Effective
Videos are a powerful way to present information because they engage multiple senses. By combining visuals and sound, they make it easier for learners to absorb and retain concepts. Videos allow for the demonstration of complex ideas or processes that may be hard to explain with just text or audio, making them more accessible and impactful.
This makes video an excellent tool for breaking down concepts into digestible content while keeping the viewer engaged. Here’s why incorporating videos into your course matters:
1. It Boosts Engagement: Videos are an intriguing way to capture attention. In fact, bite-sized e-learning videos produce 50% more engagement compared to traditional formats. For instance, imagine taking a digital marketing course where instead of reading lengthy texts, you watch vibrant videos that showcase successful campaigns from brands like Nike. This engaging format keeps learners interested and eager to absorb more content.
2. Enhance Retention: Recent studies pictures that the students who learn through videos retain information better Also, it is said that students who learnt via video scored up to 6.2% higher on tests than those who didn’t. For example, when preparing for the reading section, a visual explanatory video that covers complex literary themes through engaging visuals and audio can help students remember key concepts better than reading more complex passages alone.
3. Provide Clear Demonstrations: Videos excel at demonstrating problem-solving techniques and strategies that are vital for SAT success. Consider a video tutorial that walks students through the steps of solving a challenging math problem, complete with visual aids and clear explanations. This hands-on approach not only clarifies difficult concepts but also provides students with practical strategies they can apply during the actual test.
4. Simplify Complex Topics: The SAT covers a wide range of subjects, some of which can be quite complex. Research suggests that videos under six minutes are particularly effective for maintaining student attention. For example, a short video that simplifies the concept of geometry by using relatable scenarios—like designing a room or planning a garden—can make these topics more approachable and easier to understand for DigitalSAT students.
This justifies that incorporating video content into your course can transform the learning experience. If you're thinking about creating videos for online courses, focusing on quality and relevance will ensure your course stands out.
How do you make an effective training video for your online course?
By addressing key aspects like understanding your audience, defining objectives, and structuring your content, you can create impactful videos that resonate with learners. Let’s break it down into practical steps.
“When crafting effective training videos, keep them under eight minutes and incorporate interactive quizzes—like H5P’s in-video prompts that pause playback until users respond—to transform a passive viewing experience into active participation, ensuring the content is fully watched while also providing valuable analytics to refine and optimize the learning experience.”
1. Understand Your Audience
Creating engaging training videos begins with knowing how your audience behaves and their level of tech fluency. These factors influence the effectiveness of your content and how it’s received.
Engagement Behavior: Viewers have different interaction styles. Some watch the video all at once, while others prefer pausing and rewatching. Break the content into short, focused segments and add interactive elements to keep them engaged.
Tech Fluency: Adapt to the audience's comfort with technology. For those familiar with tech, use features like interactive videos. For others, focus on clear visuals and simple navigation to avoid overwhelming them.
Understanding these two aspects allows you to create training videos that are both engaging and accessible, ensuring the content resonates well and is effective in its delivery.
2. Define the Purpose of Your Video
A clear objective is essential for creating effective content.
Do you want to demonstrate and educate? Videos are ideal for showcasing how to use a product or perform specific tasks. They provide a visual way to clarify complex ideas.
Do you want to provide easy-to-digest, byte-sized answers for specific questions? Training videos can answer frequently asked questions, saving time and improving learner satisfaction.
Do you want to enhance engagement? If you use a course creation tool like EdisonOS, you can create flashcards or pop quizzes to retain the learner’s attention. Breaking the content delivery patterns within a video will enable your students to retain interest and attention towards the video better.
3. Decide the Ideal Length
The length of your training video plays a significant role in maintaining attention and effectiveness.
Keep It Concise: Focus on delivering information efficiently without overloading the viewer.
Modular Structure: Divide longer topics into shorter videos to make content more digestible.
In-Depth Coverage: Spend extra time on sections that require detailed explanations while keeping simpler topics brief.
By following this approach, you can create training videos that are engaging, informative, and valuable to your audience. Whether you’re enhancing an existing course or building one from scratch, thoughtful planning will ensure your videos make a lasting impact.
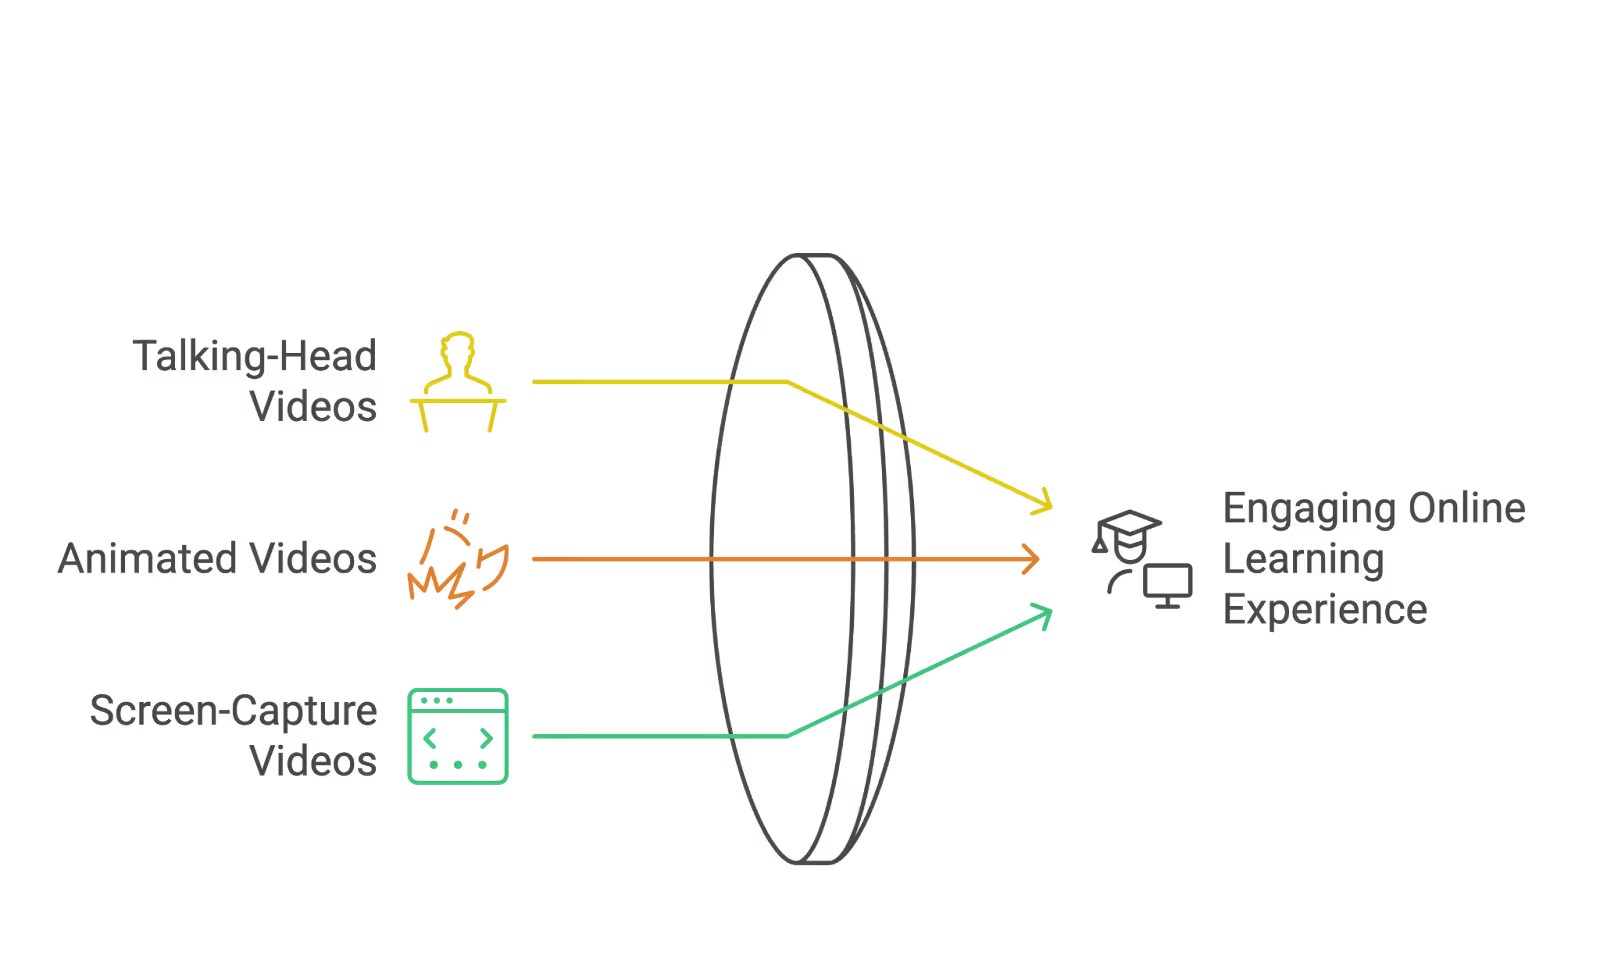
Types of Video Content in Online Courses
Creating videos for an online course requires choosing the right type of content to meet your goals and engage your audience. EdisonOS provides the tools and support to help tutors create impactful and effective video content. Below are the commonly used types of videos you can explore
Talking-Head Videos
This format involves the tutor speaking directly to the camera. It helps establish a connection with learners by giving a face and voice to the course content.
Uses:
Course introductions or summaries.
Delivering lectures or sharing insights.
Building a sense of personal interaction.
With EdisonOS, you can easily record and upload these videos, providing your learners with a focused and professional experience.
Animated Videos
Animated videos use visual elements like graphics, infographics, or 2D animations to simplify complex topics. They are visually engaging and effective for illustrating ideas.
Uses:
Breaking down difficult concepts.
Explaining abstract ideas or processes.
Adding creative and engaging visuals to your content.
EdisonOS enables seamless integration of animated videos, ensuring your learners stay engaged throughout the course.
Screen-Capture Videos
These videos record your computer screen while you explain what’s being shown, often with voiceover guidance. They are particularly useful for technical or software-related topics.
Uses:
Demonstrating how to use software or tools.
Explaining workflows and step-by-step processes.
Providing guided tutorials for technical concepts.
EdisonOS supports screen-capture videos, making it simple to produce and share them with your audience.
Demonstration or "How-To" Videos
This format visually shows the steps involved in a process, making it easier for learners to follow and replicate the actions.
Uses:
Teaching hands-on skills or techniques.
Showing real-world applications of concepts.
Explaining procedures clearly and thoroughly.
EdisonOS makes it easy to create and host demonstration videos, giving your learners a clear path to understanding and application.
By selecting the right type of video for your course content, you can create an engaging and effective learning experience. EdisonOS offers the flexibility and features needed to support any video format you choose.
Steps for Creating Attractive Videos for Online Courses
If you’re looking for a structured way to learn how to create videos for online courses, these steps will help you craft engaging and effective content. Each step focuses on actionable methods to produce high-quality videos that enhance your course and resonate with your audience.
1. Plan Before Creating
Start with a clear plan for your video. Consider:
The purpose of the video in your course structure.
The tone and style that suit your audience.
The key message or takeaway for learners.
Map out how the video will fit into your course. Whether you’re creating a step-by-step guide or a demonstration, having a roadmap will streamline the process of creating videos for online courses.
2. Decide What Type of Video to Create
Choosing the right type of video depends on your subject and audience needs. Popular options include:
Screen-Capture Videos: Ideal for explaining software or technical steps.
Talking-Head Videos: Great for connecting with your audience on a personal level.
Voiceover Videos: Perfect for narrating slides or visual elements.
Select a format that ensures you create quality videos for online courses that effectively convey your message.
3. Create an Outline for Your Course
An outline keeps your content organized and ensures your videos stay focused. Break the course into sections and decide on the content for each video. For example:
Section 1: Course Introduction
Section 2: Practical Applications
Write scripts for each video to cover the main points and guide your production.
4. Gather Equipment
Having the right tools is critical for producing professional-looking videos. Essentials include:
A Camera: An HD camera to capture clear visuals.
A Microphone: A quality mic for clear sound.
Editing Software: Tools like iMovie or Windows Movie Maker for post-production.
These basics will help you start creating videos for online courses that look and sound professional.
5. Prepare Your Filming Space
Set up a clean, quiet, and well-lit area for recording. Organize your materials to keep everything within reach and minimize disruptions. Preparing your space allows you to focus on delivering the best content.
6. Set Up Camera and Lighting
Position the camera at eye level for a natural and engaging perspective. Adjust the lighting to remove shadows and highlight the subject. A lapel or lavalier microphone can improve audio quality, ensuring you create quality videos for online courses that are clear and professional.
7. Double-Check Before Recording
Before you start filming:
Test the camera, microphone, and lighting.
Confirm your script is accessible and complete.
Check for any potential interruptions in your environment.
This final step ensures a smooth recording session, saving time and avoiding unnecessary reshoots.
By following these steps, you’ll learn how to create videos for online courses that captivate your audience. With proper planning and execution, you can create quality videos for online courses that stand out and provide an exceptional learning experience.
Tips for Recording Online Courses
1. Keep the Background Plain
If you're looking to start an online course or record a video for YouTube, don't try to make it look like a TV studio.
One of the most annoying things about many online course videos is that the background has so much going on—photos, posters, knick-knacks—that the person on screen is hard to see, and the viewer can't tell what's going on. Set up your camera facing away from distractions and keep your background as simple as possible—a plain wall will do fine. You want people to be able to see you and hear you instead of being distracted by what's behind you.
2. Clean your Audio
If there's any background noise, remove it from your recording before you upload it.
Even if you're wearing headphones during the recording, some noise from outside may still creep into the recording, even if it's just a bit of wind rustling through leaves or cars driving by. Plenty of digital plug-ins available for free download (most notably Adobe Audition) can help clean up your audio and remove unwanted noises without affecting the quality of the original recording too much.
3. Use Hand Gestures
When recording an online course, it's not just what you say that matters. It's also how you say it. You can have the best content in the world, but if your students aren't able to pay attention, they won't benefit much from it. One way to keep them engaged is to use hand gestures when speaking. You might not be able to convey every detail or subtlety with your hands, but gesturing will help keep your students engaged.
It's been shown that people retain more information when they can see a speaker's body language and facial expressions along with what the speaker is saying.
Conclusion
Creating videos for online courses is all about keeping your audience engaged and delivering content effectively. If you're exploring how to create videos for online courses that stand out, focus on crafting clear introductions and endings, adding visuals, and creating moments of connection with your audience.
To create quality videos for online courses, include real-world examples, such as photos or clips from your expertise, to make the content relatable and engaging. Experiment with different formats and styles to determine what resonates best with your students, turning each video into a valuable learning experience.
If you're ready to start creating or improving your course videos, exploreEdisonOS for tips and tools to help you succeed. Visit our blogs for more guidance on taking your online teaching to the next level!
ABOUT THE AUTHOR
Riddhima Parker
Content Marketing Associate
A digital professional having experience over 2 years of rich and qualitative experience in research, writing, and publishing compelling content covering diverse business sectors like EdTech, Internet, Publishing, and Entertainment, amongst others.


.png)
.webp)
