
All Blogs

Key Takeaways
- Why Have a Home Studio?: A home video recording studio saves time, offers better control, enhances presentation quality, and expands audience reach for online classes.
- Choosing a Setup: Select from talking head, full-body, or top-down setups based on your course type and ensure proper lighting and framing.
- Essential Equipment: Use affordable tools like smartphones, lightweight tripods, Snowball microphones, and natural or softbox lighting for high-quality recordings.
- Focus on Quality: Investing in the right equipment and techniques ensures professional-looking videos, boosting engagement and competitiveness in online education.
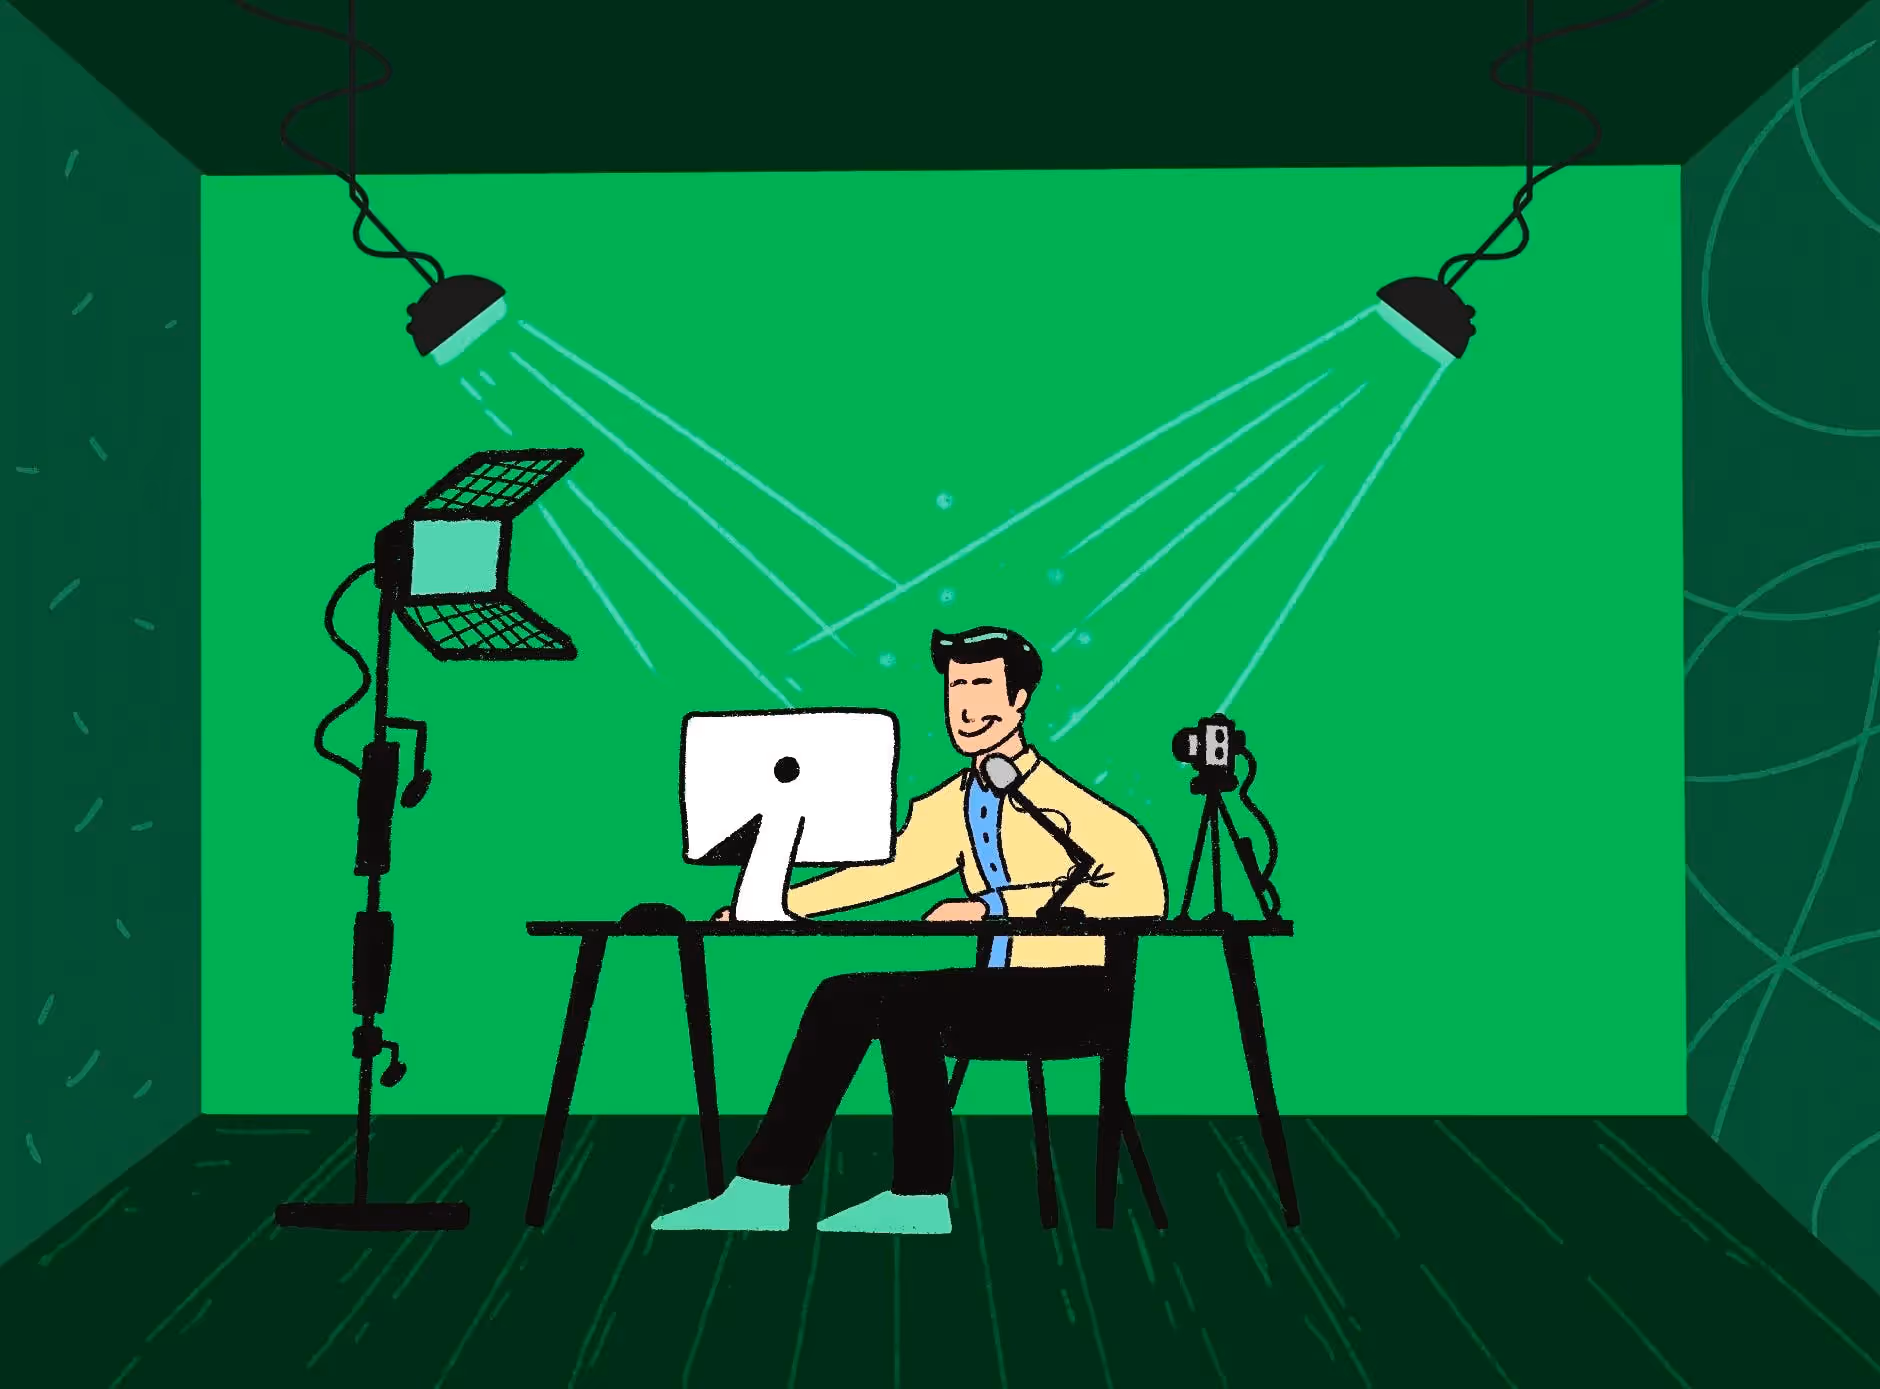
Do you think that it is quite challenging to set up a complete home video recording studio for your online classes? It is not that tough because you need to understand how the recording system works. Use this advice and the equipment below to control your entire recording process and improve its quality! We will be focusing more on setting up a home video recording studio for your online classes.
It is not easy to set up an online class for people. It is a different process when recording the videos for online courses. It’s better to know about all the things you need to consider when starting your video recordings so that you can be presentable and updated with all the innovative technologies in vogue. A home video recording studio is an excellent alternative to conventional recording studios. Setting up a video recording studio at home sounds like a costly investment. However, it doesn’t have to be as expensive as you think. You can build one in your own home with much less investment. ‘Where can I find an affordable home video recording studio equipment?’ I’m sure you’re asking yourself this question. But don’t worry… you’ve come to the right place!
Why have a Video Recording Studio at Home for your Online Classes?
Do you have a talent for teaching or a passion for learning? Do you have an idea to start your own business? Are you looking to make money online by sharing your knowledge with others? Then, in that case, one of the best ways to become a teacher and share more about your passion is to create videos and upload them on YouTube.
Here are the top 4 reasons to get a home video recording studio:
- Save time travelling to and from your recording studio
- Do a better job presenting your content
- Share your work with more people
- Have complete control over your final product
Deciding on a Recording Studio Setup
When planning out your course and production workflow, you’re going to need to decide on your recording studio setup. Once you’ve decided on a topic to teach, it’s time to think about a few technical details. You want to make sure you have everything you need to create a good-quality video.
Choosing a video recording setup for your online class is more than just choosing which camera to use. You have to consider the type of videos you’ll be recording and what they’ll be used for. I see people using three types of video recording setups, and the one you choose will depend on the type of class you’re teaching. I will be breaking down the three most common setups and explaining their pros and cons.
No matter what class you’re teaching, there are three different setups you can use to record your screen:
- A Talking Head Setup
- A Full-body Setup
- A Top-Down Video Setup
A Talking Head Setup
A talking head video (sometimes called a “talking head”, “talking heads”, or just “headshot”) is where a person appears on screen, usually from the waist up, and speaks directly to the camera. Talking head videos for those who want to record themselves and the voice over is the central element of the video. This is your best option. This video style mainly showcases your face and a piece of paper (or a teleprompter) in the background with a script on it. This way, you can speak with both hands-frees.
I’d also recommend that instead of using notes, you create a word bank on your screen using Word or PowerPoint so that when you get stuck, you can use it to help fill in any gaps. If you have a small office, this recording studio plan might be perfect for you. When you don’t need to demonstrate a lot of movement, for example teaching something simple like “how to use Microsoft Excel”, it’s easy to find a spot in your office that includes good lighting and a great backdrop.
Give yourself enough space near the window because natural light will come into the room.
A Full-Body Setup
As you choose what kind of setup is right for you, it’s essential to consider the kind of videos you’ll create. In a full-body video setup, the camera is positioned further away so that your entire body is visible in the frame. Whether you’re a business owner trying to get more clients or an athlete trying to take your game from amateur to pro, one of the best ways to grow your audience and network is through video. Since people these days have short attention spans with a long list of videos competing for space in their queue, you need to make sure that your video is engaging and interactive. Now, if you are an athlete or sports coach trying to teach students different exercises, game techniques, etc., you need a full-body shot.
In a full-body setup, the students can see your movements clearly and understand techniques better.
A full-body setup is also beneficial for personality development coaches as well.
A Top-Down Video Setup
In top-down videos, we see what’s happening above the person speaking — but this isn’t a very common type of video for online courses. If you’re recording the kinds of video that need to involve your hands – like cooking, exercising or drawing for a tutorial – you should take advantage of something called ‘the top-down setup’. It means holding your camera above eye level and using a desk-mounted floating arm (which takes the camera’s weight) to adjust the height and angle of your shot. It’s pretty cool!
Let us look into suitable equipment for your needs that won’t break the bank.
For some reason, the setup for recording online classes is often overlooked. But using a high-quality camera, tripod and microphone can add a lot to your video quality (and not a lot to your budget). Let’s go over your options.
Selecting Cameras for Home Video Recording
You will want your video to be high resolution to upload quickly and seamlessly. I recommend shooting at least 720p (1280x720) at 30 frames per second. This is a standard default setting on most smartphones and cameras, except for older versions of Android — in which case you may need to change the settings manually.
While uploading at 1080p is excellent because it leads to beautiful results, it may take longer for this higher-quality video to load. And since people often have cell phones with slower data speeds or cap limits, 720p footage is preferred by nearly everyone. Here are 2 options, choose as per your preference:
A Smartphone
Good news! Most modern smartphones are high-quality video recording devices so that you can use your phone for both shooting and editing videos. If you want to go this route, make sure that your phone can have a 4K resolution (most cameras are). Yes, flip your phone into horizontal mode and start recording your lectures. This is a good option if you are a beginner and don’t want to invest in an expensive camera.
As long as the video quality is up to mark, you are good to go! Before you hit record, make sure you have enough memory storage on the phone and that your framing captures all of you.
DSLR+Lens+Memory Card
If you’re a pro and have the money, I recommend making your video creation flawless. I think the best option is to buy a camera that has a screen that can flip out so you can see yourself while you record.
DSLR cameras are of the best quality if you have a friendly budget. These cameras always have a large screen that flips out where you can see yourself when recording. You can surf for different options on Amazon that best suits your needs.
Camera Mount/Tripods for your Online Classes
You might have an expensive camera, but with a poor system for recording your video content, all you’re working with is a fancy paperweight. One of the essential pieces of equipment you can purchase for your online classes is a good quality camera mount for your camera. Here are some camera mounts/tripods that are suitable for the setups we discussed earlier in this article:
A Lightweight Tripod
This professional-grade video camera tripod features a fast and easy way to mount your camera or smartphone on a tripod. All you have to do is position the included Universal Smartphone adapter or GoPro attachment, slide it into the adapter, and then attach it to your tripod. Tripod comes with a built-in bubble level for easy setup and a three-way head that allows for tilt and swivel motion with portrait or landscape options. You’ll also get a carrying case and two different mounting plates that fit almost any video, digital, or still camera. Durable, lightweight aluminium construction provides optimal stability and durability; maximum load capacity is 3kg for optimal performance. This tripod has adjustable legs and rubber feet, perfect for indoor and outdoor use.
GorillaPod 3K Kit
Camera mounts are essential for online classes. The flexibility of this mount allows you to adjust it to any situation and place additional weight on the feet for added stability.
The mounts feature a bubble level for quick and easy levelling and camera platforms that can be adjusted from 90° to 360°, making them perfect for both landscape and portrait orientations. Its sturdy construction comprises a rubberised ring and foot grips that ensure the mount won’t move an inch even in unstable terrain. With the help of a camera mount, you can capture HD quality videos and have them ready to be shared with friends or uploaded onto various social media channels. Plus, your hands are free to conduct group discussions or lead presentations.
Gooseneck Bed Phone Holder Mount
The gooseneck phone holder is not just a gadget. It can also be regarded as an essential cell phone accessory. The gooseneck is so flexible. You can change the direction of the long arm to match your needs. It is easy to carry and operate. The adjustable clamp base means you can choose to mount this cell phone clip in different places, such as bedroom headboard, kitchen countertop, desk, etc. Take advantage of this portable bedside phone stand whenever you want.
This clamp is stable and durable enough to hold the smartphone firmly while providing flexibility and adjustability for the long arm to bend in any direction.
Microphones for Online Classes
If you’re making a how-to video for YouTube, it can be helpful to invest in an external microphone that’s pretty easy to set up. The right microphone is a critical component of any high-quality online audio course. Indeed, even the best content can’t make up for lousy audio quality. A good microphone will ensure that your students’ experience is enjoyable and lets them focus on what matters: your content, not your equipment.
Snowball Mic
Making an online classroom doesn’t have to be complicated. It would be best if you didn’t have a professional studio or an expensive microphone for your students. You can easily use a Snowball Microphone or Blue Snowflake Mesh Mic for your dual-channel interface.
Shotgun Mic
The key to picking the right microphone for online classes and any podcasting or video recording is knowing what the mic can do. There are mainly 3 types of mics.
The three main types of mics are:
- A highly directional shotgun.
- A lavalier (or lapel) picks up voices close to it.
- An omnidirectional mic picks up sound from all sides.
Shotgun mics are best used when you’re in one position and not moving around much, such as with a talking head video, recording a voiceover and vlogging while walking.
Lighting for Video Recording at Home
Lighting your room is essential for many reasons. You want to make sure that the right amount of light is hitting your subject, but to do this, you’ll need to get some lighting that gives you the correct type of lighting that you need. Let us see some options for lighting up your videos correctly:
Natural Lighting
Instead of investing in a softbox lighting setup, you can position yourself facing a window. The cheapest and easiest way to create a recording studio is to record using your phone and take advantage of the natural light from a window as a light source. Natural lighting is very flattering and can drastically improve the quality of your video, but you’ll need to consider where the light is coming from to avoid exposure issues.
Softbox Lighting
When recording a video at home, you may want your background to look white, even though it might be a bit boring.
If that’s the case, you can use a cheap softbox light that lights a large area with softer light. Make sure you position your lights far enough away to have a light fall smoother and on a larger area.
Conclusion
You have to decide for yourself what equipment you need and what you are willing to spend. Remember, the quality of your videos is dependent on the quality of the equipment. If you use a webcam or smartphone, there will be some limitations compared to using professional cameras, editing software and microphones. Your goal is to create videos that will look professional and that you can be proud of. As more people join online classes, the competition rises and the demand for quality rises. The bottom line is that you want everything to work smoothly and fast so that you can focus on your students and not your technology.
When you decide to work in the video recording studio, make sure that you choose your equipment wisely. It will determine how effective your videos are and how efficient your workflow is. Follow the above tips, and you will find yourself working in the best conditions possible. Best of luck!
ABOUT THE AUTHOR

Riddhima Parker

Content Marketing Associate
A digital professional having experience over 2 years of rich and qualitative experience in research, writing, and publishing compelling content covering diverse business sectors like EdTech, Internet, Publishing, and Entertainment, amongst others.
Tutors Edge by EdisonOS
Get Exclusive test insights and updates
in our newsletter, curated to help tutors stay ahead!
in our newsletter, curated to help tutors stay ahead!
Oops! Something went wrong while submitting the form.
The EdisonOS Newsletter
One essential monthly read for college readiness educators
Recommended Reads


Recommended Podcasts

Ananta Khurana , a Soft Skills Trainer with over 10 years of experience in empowering individuals to enhance their personal development
Listen now

Hubert DMello is the Education Head and Co-Founder of Skoolbx that believes in providing high-quality and affordable tutoring to students all over the world
Listen now


.png)
.webp)
